
Understanding Taping and Finishing
Taping and finishing are critical steps in the drywall installation process, playing an essential role in determining the overall quality of interior walls. The primary purpose of taping is to conceal seams and joints between drywall sheets, providing a seamless appearance. When done correctly, taping creates a uniform edge that minimizes the visibility of these joints, which is essential for achieving a polished and professional finish.
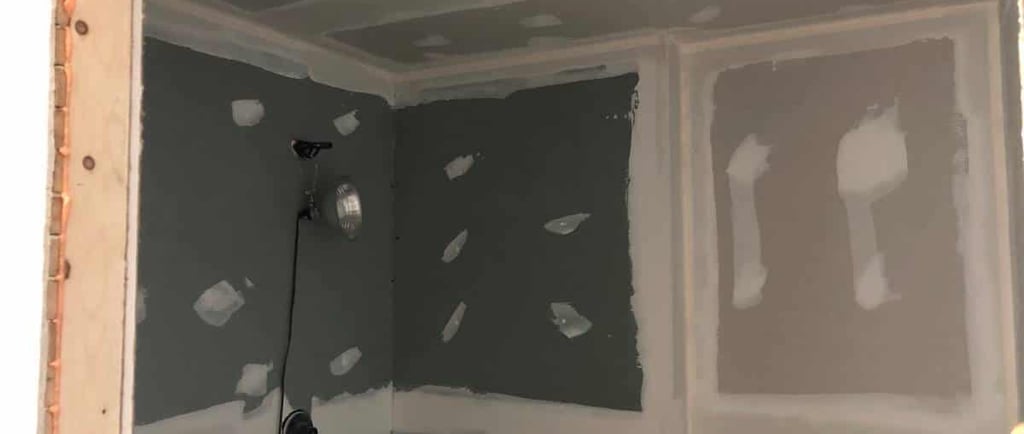
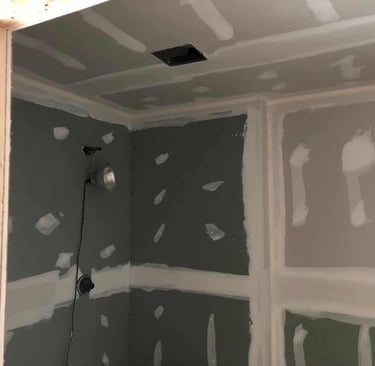
Finishing, on the other hand, involves applying multiple layers of joint compound over the taped seams to create a smooth and even surface. This step is crucial as it prepares the walls for subsequent treatments such as painting or texturing. A well-finished surface not only enhances the aesthetic appeal of the space but also contributes to the durability and integrity of the wall. Common terminology in this process includes terms such as "joint compound," "tape," "mud," and "sanding," which refer to the materials and techniques used in taping and finishing.
The process begins with the application of joint compound, followed by the embedding of tape, typically made from paper or fiberglass. After the tape is applied, additional layers of joint compound are added, allowing each layer to dry thoroughly before sanding and applying the next. This meticulous process ensures that seams are adequately hidden and the surface is flawlessly prepared for final finishes. It is advisable to use the appropriate tools, such as a taping knife and a sanding block, to achieve optimal results.
In summary, taping and finishing are not merely procedural tasks but rather fundamental techniques that significantly impact the appearance and quality of drywall installations. Understanding their significance helps in appreciating the skill involved in achieving a high-standard finish.
Key Factors for a Quality Taping Job
Achieving a high-quality taping job is an intricate process that hinges on several essential factors. One of the primary considerations is the selection of materials. The type of tape and joint compound used can significantly impact the final outcome. For instance, drywall tape, which is available in paper and fiberglass mesh varieties, serves different purposes. Paper tape is typically preferred for its strength and usability in interior joint applications, while fiberglass mesh tape is known for its ease of application and resistance to cracking.
Another vital factor is the application technique. This includes the angle at which the tape is applied, the amount of pressure exerted, and the speed with which the task is executed. A proper angle ensures that the tape adheres smoothly to the joint without bubbling or wrinkling. Consistent pressure helps in achieving a flat finish and prevents the tape from lifting. Importantly, applying the compound at an even speed allows for a uniform coat that avoids excessive buildup in any one area.
Corner reinforcement, though often overlooked, is crucial in ensuring long-lasting durability. Utilizing corner beads during the taping process provides added stability at high-stress points, effectively reducing the risk of cracks as the building settles. The quality of the finish can also be influenced by the skill level and experience of the individual executing the taping job. A seasoned professional is likely to possess advanced techniques that enhance the overall quality of the work.
Lastly, the utilization of proper tools cannot be understated. Tools such as drywall knives, hawks, and corner trowels play a significant role in achieving a superior finish. Investing in high-quality tools facilitates a smoother application, allowing for better control and precision during the taping process. Collectively, these factors contribute to achieving a taping job that meets professional standards and endures the test of time.
Common Mistakes That Lead to Bad Finishing
When it comes to drywall finishing, there are several common mistakes that can severely compromise the quality of the final result. One of the most significant pitfalls is the use of incorrect materials. Selecting an inappropriate joint compound can lead to problems such as cracking or poor adhesion. For instance, using a fast-drying compound on large areas may result in difficulty achieving a smooth finish, as it does not allow enough time for effective blending between seams.
Another frequent error is insufficient drying time between coats of joint compound. Many novice installers are eager to move quickly to the next step and neglect to allow for adequate drying periods. This can result in visible seams on the final surface. Each layer, whether it’s the initial or the finish coat, must dry completely to ensure a seamless appearance. If not allowed enough time, the excess moisture will interfere with sanding and could even compromise the durability of the finish.
Additionally, improper sanding techniques can lead to obvious imperfections in the finished wall. Applying excessive pressure or using the wrong grit of sandpaper can cause scratches or gouges in the drywall surface, making it difficult to achieve a smooth, consistent finish. It is essential to sand lightly and progressively through grits to reduce visible flaws. Furthermore, neglecting to carefully inspect the surface after sanding may leave behind remnants of rough patches that will become evident once paint is applied.
Lastly, insufficient coats of joint compound can also contribute to unresolved seams or textures. Many installers make the mistake of thinking one or two coats is adequate, but more coats are often necessary to create a professional and polished look. Each layer adds a bit more depth, smoothing out imperfections that are not resolved in fewer applications.
Tips for Achieving Professional-Level Finishing
The process of taping and finishing drywall is a key aspect of interior construction that demands both skill and precision. To achieve a professional-level finish, it is essential to follow several best practices that enhance the quality of the work while minimizing the potential for imperfections. First and foremost, ensure that you have the right tools at your disposal. A quality drywall taping knife, a utility knife for scoring, and a taping banjo for applying the tape can dramatically improve your results.
When applying tape, begin with clean, dry surfaces, as moisture or debris can interfere with adhesion. Apply a thin, even layer of joint compound and immediately embed the tape, smoothing it simultaneously to eliminate bubbles and ensure a tight bond. It is advisable to use paper tape or fiberglass mesh tape depending on your specific needs; paper tape offers superior strength, while mesh tape provides easier handling. Regardless of your choice, remember to apply subsequent layers of compound only once the first is fully dry to the touch.
After allowing the compound to dry, attention should turn to sanding. Utilize a fine-grit sanding sponge or drywall sanding block to lightly feather the edges of the tape; this will help ensure that the seam will be almost invisible after painting. Always sand in a circular motion and avoid over-sanding to prevent damage to the surface. Following sanding, preparing the area for painting is crucial. This may include a thorough cleaning of dust from the surfaces and applying a primer to enhance paint adhesion.
Throughout the taping and finishing process, take the time to review your work at each stage. A critical eye can catch imperfections before they become embedded in your project. Lastly, mastering these techniques requires patience and practice; dedication to honing your skills will ultimately yield a result that meets professional standards and contributes to the overall aesthetic of the space.